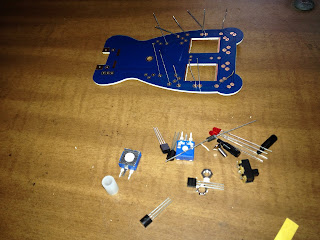
I recently woke up and decided to work on a robot I got a while ago. It's a Velleman mini kit, the MK 127 Running Microbug.
I looked online for the instructions in case it's a little more detailed than the picture ones within the kit. It had an electrical diagram but otherwise both sets of instructions are the same. Also, on the website itself, it tells you that you can test the motors with the ends of the battery holder and some batteries to find out if the motors themselves work. What it didn't mention which parts do the holder wires touch. It's the two metal areas where you thread through the jumper cables which are later soldered onto the board.
 |
| The resistors are ready to be soldered. |
Since I had soldered before and I knew the kit needed soldering, I was pretty good until it came time to solder the diode. The instructions didn't say anything about which side it should be soldered on but the board had a drawing that was pretty similar to how the the diode itself it looked. So I just went with it and soldered on the diode with the plastic cover.
Note: My resistor trimmer/potentiometer was square unlike most of the videos online. If you twist the knob in the potentiometer, you can control how much resistant goes into the circuit from that point and thus how bright the LEDs are.
I got a bit stuck with the motors because I didn't realize I'd need to sand the sides of the motors. Using the edge of a coin doesn't work to sand it, something like medium grade sandpaper at least, might work. Then the sides of the motors were soldered onto the board. Which I still don't know why. As in, is it for stabilizing the motors or for actually letting electricity flow through the sides which were previously coated before being sanded. Also, in case anyone wants to know, they are submarine motors with a chasis.
 |
| Finished Running Microbug |
So, then I had everything soldered on and I put in some brand new batteries and the circuit didn't work. I fiddled around with it a bit, and I realized if I held the battery holder a certain way then one of the motors would rotate. I still haven't gotten the other half of the robot to work so it's not a good running bug, more like a flailing bug with one eye. Sometimes I got both eyes to work. Other times only the eye on the same side as the motor turned on. Twisting the knob in the potentiometer definitely adjusted the bug's eyes, but didn't seem to have any effect on the motor speed. Also, the motor stopped for sure when the LDRs were covered up.
Now, I've built my first robot. It doesn't work well but it finally exists!